Wednesday, November 28, 2007

Three Weeks Later

Things have been pretty uneventful in the nano reef as it approaches its first month. The good news is that everything has been consistently stable for the past two weeks:
  • Temperature: 80° F
  • Specific gravity: 1.024 ppt
  • pH: 8.3
  • KH (alkalinity): 10° dKH
  • NH3/NH4 ammonia: 0 ppm
  • NO2 (nitrite): 0 ppm
  • NO3 (nitrate): 0 ppm
  • Calcium: 560 mg/L
  • Phosphate: 0

The calcium level is a bit high. Ideally it should be somewhere between 400–500 mg/L. A level this high shouldn't be too alarming but fluctuation in levels can cause pH and alkalinity levels to fluctuate as well, which isn't a good thing. For now I'll have to monitor the calcium level carefully to make sure it stabilizes. On the plus side, this high level of calcium is probably responsible for the rapid growth of coralline algae.

As far as livestock, today I found an empty nassarius snail. Not sure if it died on its own or if it was attacked by one of the hermits. The hermits have been playing nice with the snails all this time though so I'm ruling that possibility out for now. My clean-up crew in general can't seem to keep up with the algae growth so I will have to add a few more recruits.

With the tank's steady progress and stable parameters, I might just be ready to throw in my first coral this weekend.

Sunday, November 18, 2007

The Clean-Up Crew

With my ammonia, nitrite and nitrate down to zero, I've decided to recruit my clean-up crew. I paid my favorite LFS a visit to find my recruits. Candidates are typically small reef-safe hermit crabs and reef-safe snails. A lot of people tend to pick one group or the other and hardly mix as hermit crabs can be aggressive towards snails; eating them and stealing their shells. So far my blue leg hermit has been nice to my mystery snails so I figure as long as the snails are smaller they'll probably leave them alone.

I decided to recruit two blue leg hermits to go along with the one I already have and three nassarius snails which are known for their habit of consuming detritus and decaying organics. Nassarius snails like to bury themselves in the sand which will help maintain adequate oxygen levels in the substrate. The blue leg hermits on the other hand are great for keeping down algae and sifting through the sand.

Acclamating the nassarius snails (left) and the blue leg hermit crabs (right) by floating the bag for fifteen minutes. While some people employ a long process with water drips, I find these specimens to be pretty hardy enough to be readily tossed in the tank.


The hermits congregating shortly after being thrown in the tank while the snails scoped out their places...


Another addition to the tank is a ball of chaetomorpha. Chaeto is a type of macroalgae commonly used as additional filtration as it removes phosphates and nitrates from the water. In doing this, chaeto can also prevent the growth of undesirable algae in the tank by using up the nutrients needed by the algae. Like most macroalgae they are commonly placed in an outside filter box or in a separate refugium sump.

In large tanks, a separate sump can serve as a refugium where heaters, protein skimmers and other filter devices can be kept without cluttering the display tank. A deep sand bed can also be kept in a refugium for added biological filtration as well as macroalgae like chaeto and serve as a protected breeding ground for copepods and amphipods which are a food source for certain types of fish. Considering the size of my tank, a refugium is out of the question though some people have rigged power filter boxes into small ones. I however, want to keep a simple minimalist approach to this setup without having to add external sumps and extra lighting.

I placed a clump of chaeto in the rear right corner of the tank where it is tucked away yet it can still receive the sufficient lighting that it needs. It's also in the spot where the power filter and the powerhead intakes are located so it receives good circulation but not so much turbulence that would otherwise scatter it all over the tank.


Notice from the top how this spot is conveniently concealed:


With its fast growth rate, the only thing I have to make sure is to tumble and harvest it regularly to keep it from taking over the tank and getting everywhere. In return, it will help maintain stability in my tank.

Today's Expenses:

  • Chaetomorpha bunch: $10 (with plenty of leftovers)
  • (2) Blue leg hermit crabs: $3.80 ($1.90 each)
  • (3) Nassarius snails: $4.50 ($1.50 each)

TOTAL COST: $18.30

Saturday, November 17, 2007

Two Weeks Later


I finally got two new individual testers today and feel more comfortable with my readings. One is for ammonia and the other for nitrite, both by Aquarium Pharmaceuticals. Ran some tests today (one day ahead of my scheduled maintenance) and got some pretty good results:
  • NH3/NH4 (ammonia): 0 ppm
  • NO2 (nitrite): 0 ppm
  • NO3 (nitrate): 0 ppm

Here are the test tubes with those readings:

I did a 10% water change and replaced the stock carbon filter with Purigen for stronger chemical filtration. While the use of activated carbon in reef aquariums (there's a link to a good article on the right) is debatable depending on who you speak with, I think it's an important component in order to maintain stability in a tank this size. It removes dissolved organics and selected chemicals from the water by absorption and adsorption.

Anyway all geek talk aside, Purigen comes highly recommended by people as it's supposedly 500% more effective than your ordinary activated carbon.

I got a 250 mL bottle of Purigen that's formulated to treat 250 gallons of water which means that a gallon of water can be treated with 1 mL of Purigen.

Purigen has the consistency of tiny little beads so I got a filter media bag to put the stuff in.

They recommend you rinse the filter (with RO/DI water, of course) prior to placing it in the filter. Doing so didn't release any residue or debris in the water so I'm not exactly sure why they tell you to do this.


I also got a mini Mag-Float which comes in handy for cleaning algae off the glass. Up to this point I've been doing it ghetto style—sticking my hand in the tank and scraping the algae off with my fingers.

Copious amount of debris have settled on certain parts of the live rock where the diatom bloom use to be, trapped under a layer of biofilm. This is a perfect time for me to pick out a clean up crew to help clean some of that mess.

Today's expenses after a recent trip to Petsmart:

  • API Ammonia Test Kit: $7.49
  • API Nitrite Test Kit: $6.99
  • Seachem Purigen: $6.98
  • Aqua-Pure Filter Media Bag: $0.89
  • Mini Mag-Float: $7.99

TOTAL COST: $32.69 (plus tax)

Wednesday, November 14, 2007

Day 10


Ten days after setting up and the tank and the water parameters are looking good. The tank has definitely benefited from the added circulation and has been crystal clear. This may have also helped keep the diatom bloom down. I didn't get the chance to pick up a different test kit to compare against the Red Sea Marine Lab which I feel has been giving me inaccurate results. The readings from today are as follows:
  • Temperature: 80° F
  • Specific gravity: 1.023 ppt
  • pH: 8.3
  • KH (alkalinity): 2.7 meq/L (10° dKH with API)
  • NH3/NH4 (ammonia): less than 0.25 ppm
  • NO2 (nitrite): 0 ppm
  • NO3 (nitrate): 2.5 ppm (0 ppm with API)

The test results actually gave me some new figures though I'm still sketchy about its accuracy. While the ammonia is showing at less than 0.25 ppm, it's still not completely down to zero although nitrite is down to zero all the way. Nitrate is reading at 2.5 ppm but is reading at zero with the API tester.

As tempting as it is for me to start adding livestock at this point, it's probably best to wait for a couple more weeks until I know for sure that my parameters are stable and that the levels of ammonia, nitrite and nitrate are consistently down to zero.


Sunday, November 11, 2007

Diatoms: What's all that brown crap?


My tank has been up for a week now and just a day ago I started noticing patches of brown algae on one of my live rocks and parts of the sand. These brown patches are diatoms which are one of the most common types of phytoplankton found in marine habitats. Although diatoms are generally not a good sign in an established tank, they are part of the nitrogen cycle and their presence in a new tank can signify that the cycle is moving along. Several things can trigger a diatom bloom: high levels of nitrate, significant amounts of phosphate among many others. I dismissed phosphate as a possible cause as I've been diligently using reverse osmosis water for top offs. This could only mean high levels of nitrate in my tank which means ammonia and nitrite levels have dropped down to zero (or pretty close to zero) and my tank is nearing the end of its cycle! Or so I thought.

The Lying, Cheating Test Kit

So I ran the scheduled water test today and expected to see some new results. Zero levels of ammonia, zero levels of nitrite and a high level of nitrate which could possibly explain my diatom bloom. Instead I'm getting the same readings all across the board!

So I ran out and picked up a different test kit. This time I got the Reef Master Test Kit by API. This test kit has testers for everything important you need to know in a reef aquarium: carbonate hardness, calcium, phosphate and nitrate, but not ammonia and nitrite. There's another test kit called Saltwater Master Test Kit that has testers for ammonia and nitrite, but not calcium and phosphate. I figure as my tank matures, I'll be using the Reef Master Test kit more and more so I opted for this instead.

As I mentioned earlier, test readings with the Red Sea Marine Lab came out with the same readings as the last one. The Reef Master Test Kit on the other hand came out with an entirely different nitrate reading, which is the only test I can compare between the two kits. While Red Sea Marine Lab reported a nitrate reading of 5.0 ppm on both tests, the Saltwater Master Test Kit reported a nitrate reading of 10 ppm—twice more than the first kit. This level of nitrate explains my diatom bloom.

Top view of the diatom bloom:


This threw me off completely so for now on, I'm sticking with the testers by API and could probably end up banning Red Sea's testers altogether after I do some more comparison tests. The Reef Master Test Kit also reported the following readings:

  • Alkalinity: 12 dKH
  • Calcium: 500 mg/L
  • Phosphate: 0

The calcium reading is at a normal level and the phosphate result is a relief and again helps to point the diatom bloom back to high nitrate levels. In any case, this calls for my scheduled and probably much needed water change.

So I did a 10% water change and hopefully this will improve water parameters in the next week. I also cleaned out the media in the power filter and rinsed them with reverse osmosis water.

Mod of the Week


I added the first extra equipment in the tank aside from the heater. I've always felt that the stock filter that came with the tank might not be able to provide any circulation as it only circulates water at 40 gph. I added a Rio 50 powerhead which circulates water at 60 gph. The powerhead is tiny at 2.2" x 1.4" x 1.8" which is perfect for a nano tank. This added water flow gives the tank a combined circulation of 100 gph which means the whole tank is recirculated 33 times in an hour. Hopefully this provides enough circulation for the tank without producing too much flow for some of the corals that I plan to add later that require very little flow.

My expenses this week:

  • Rio 50 Powerhead: $15.00
  • API Reef Master Test Kit: $30.00
  • (6) 1 gallon bottles of purified water: $6.00
  • 1 bag Oceanic Natural Sea Salt Mix: $4.00 (for making a fresh batch of saltwater)

Thursday, November 8, 2007

Photo Updates

Some interesting things are cropping up in the tank, though most of them are too small to be captured on camera. The hitchhiker hermit crab and snail are alive and well and today I found yet another snail. There appears to be on one of the rocks some kind of worm, one end attached to the coral and the other end twitching around. Swarms of copepods can be observed on the tank glass which is definitely a good sign.

Front view:


From the left:


From the right:


From the top:

Wednesday, November 7, 2007

First Water Test


Tonight I ran the first test on my water parameters and the results where just as I expected. These are the following readings:
  • pH: 8.0
  • KH (alkalinity): 2.5 meq/L
  • NH3/NH4 (ammonia): 0.25 ppm
  • NO2 (nitrite): 0.05 ppm
  • NO3 (nitrate): 5.0 ppm

The pH is slightly lower than it needs to be which should be within the range of 8.1-8.4. Ideally around 8.3. This is important in absorbing a certain amount of acidic matter produced by waste. This correlates directly with my ammonia and nitrite level which I will soon get into. The alkalinity on the other hand is right where it should be which is a good thing as this helps prevent the pH from going any lower.

The ammonia and nitrite levels are pretty low and should expect to see them close to zero by the end of the week. This is one of the reasons why I waited until midweek for the first test as an earlier test would have shown a spike in ammonia from the amount of initial die-off. The nitrate level reading higher than the first two can only mean that nitrobacter has already started the process of converting nitrite into nitrate.

For full information on the nitrogen cycle refer to the resource link at the sidebar.

UPDATE: Upon further research, I've come to the conclusion that the Red Sea Marine Lab is highly unreliable. So unreliable they shouldn't even be selling that stuff! I'd recommend test kits by Aquarium Pharmaceuticals or Seachem. Salifert test kits are apparently the best ones. Pricey, but reliable and highly recommended.

Cycling—Thoughts and Updates


The tank is cycling beautifully and I still haven't made any water changes. So far everything is smelling good which means that nothing is rotting. And that's a good thing. The hitchhiker snail and hermit crab are also alive and well, and signs of copepods and/or amphipods can be seen in a few places. That's also a good thing.

Topping off is a bitch. Basically, as water evaporates it leaves the salts behind so a tiny fall below the water line can make a big difference in a tank this size. This is remedied by constantly re-filling the tank with reverse osmosis water. Usually once in the morning and once at night. Specific gravity has been fairly constant although I feel that my hydrometer often lies. I should probably look into getting a refractometer which not only measures specific gravity accurately but also salinity in the water. Maybe someone reading this might be nice enough to get me one for Christmas. *cough*

The stock power filter that came with the kit seems a bit bleak. I'm afraid it might not be providing enough circulation in the tank although a lot of people have had good results with only the stock filter. I might look into adding a powerhead of some sort to help move around some of the water. Thoughts for the future while I'm cycling.

Sunday, November 4, 2007

Setting Up the Tank—Hurry Up And Wait!


With all the equipment and supplies in place, the only thing I was missing was live rock which I was determined to find a good supply today so that I can setup the tank as soon as my homemade seawater was ready to use.

Last night I did some research online on local fish stores and I found one that I thought was worth visiting based on the costumer reviews that I read. The store is called Atlantis Tropical Fish & Aquariums. When I got there I was really impressed by the store and their wide selection of livestock. All their fish looked healthy and all their tanks were nice and clean. I made my way towards their corals/invertebrates area and was slightly disappointed when I couldn’t find any live rock stocked in any of their tanks.

So I asked one of the guys if they carried any live rock and was caught by surprise when I was escorted all the way to the back of the store into a storage room where they kept a vat full of rocks. I was elated by what I saw: mounds of cured Fiji live rock. They came in all sorts of shapes and sizes and all had good coloring and pleasant smell (unpleasant smelling live rock is usually a bad sign). The owner of the store himself even helped me pick out the rocks I need base on my project and was very helpful and friendly. He placed them in a styrofoam box and covered them with wet newspaper to prevent them from drying and to minimize die-off. I walked away with 6 lbs. of Fiji live rock (four rocks altogether) for $40. Not a bad price at all.

These are the four pieces of liverock I came home with:

Note the healthy coloring and the clusters of coralline algae.

I inspected the rocks carefully, removing any unwanted and dead pieces that could possibly rot in my tank. I gave them a good rinsing and prepared them for the tank. Aquascaping turned out to be a little difficult especially with such a small tank and I had to do this quickly as to not keep the rocks out of water for too long. Plus I think I took home one rock too many. Nonetheless I figured out the best configuration that created open areas between the rocks for good circulation as to avoid any dead spots.

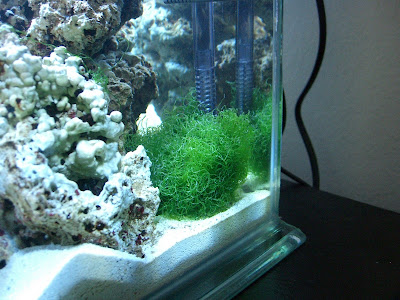
Once I had the ideal configuration I filled the tank halfway with my seawater and added the live sand. I added the live sand after I laid out the live rock to make sure the rocks are grounded firmly on the tank floor. I used a small plastic cup to slowly add the sand around the rocks, making sure not to cover any part of the rocks which could clog up the rock and increase the die-off rate in my tank during the cycling period. This became even harder as the water became cloudy and I was literally working in the dark.

An hour later the tank started to clear up and have already found a couple of hitchhikers in my live rock—a hermit crab and a snail. This starts the cycling period which means I’ll have to wait before I can add anything in my tank. The bottle of Bacardi to the right will help me through this waiting period.

As far as cycling, most people turn off their lights and encourage die-off which is referred to as hard cycling. Since my live rocks are already cured, I don’t anticipate a large amount of die-off and decided to do a soft cycle with a 12-hour photoperiod each day. However I won’t be doing any water changes just yet and have decided to just let the ammonia spike up to speed up the nitrogen cycle. I will check my parameters halfway through the week and see where I’m at. For now, I shall wait.

Saturday, November 3, 2007

The Preparation

First thing's first, I ran a water test on my tank. Filled it up with freshwater and I let it stand to check for leaks. This also gave me a chance to rinse the tank before setup.

Then I made seawater. I poured three gallons of drinking water into my 5 gallon bucket. The use of reverse osmosis/deionized water is important and can easily be bought at the store if you don't have one installed at home. I mixed in a bag of Oceanic Natural Sea Salt Mix pre-measured to make five gallons of seawater.


I did vigorous hand mixing before pouring in the other two gallons of water. I threw in the submersible powerhead to aerate and continue mixing the salt. Using the hydrometer, I adjusted the specific gravity to around 1.023 ppt (seawater ranges anywhere from 1.020 to 1.025 ppt. Reef tanks are usually maintained on the higher end between 1.023 and 1.025 ppt). Threw in the heater set at 80° F which is what I plan to set my tank at.


This helps to keep an even temperature on my water throughout the process and also to ensure that the hydrometer works fairly accurately, which can be a little off depending on fluctuation in temperature. Placed a lid over my bucket and I’m leaving it alone for 24 hours.

UPDATE: The heater and the powerhead are both in the bucket the entire time. The heater ensures that the temperature is stable and the powerhead helps to aerate the water and adds circulation to make sure the salt is completely dissolved.

The Fruitless Hunt For Live Rock

People who aren’t in the know often freak out when they hear the word live rock. The rock itself is not alive but is encrusted with various organisms that are beneficial to the reef aquarium. No two rocks are ever alike. Most of the time live rock comes directly from the ocean uncured and are teeming with organisms from corals to shrimps and crabs. These rocks must be put through a curing process to eliminate “die-off” from some of the organisms living on the rock that might not have survived the transfer from its original location to the tank. This curing process is a big part of the nitrogen cycle and must be completely done prior to adding any livestock. Cured live rock are also available as well as base rocks that have been seeded by placing them in mature tanks.

At first I thought about buying my live rock online through LiveAquaria.com (a fantastic site for marine supplies and livestock) but was wary about the type of rocks I would get. With a small tank to work with, I feel it’s important to be able to assess the rocks personally for optimal aquascaping. Another advantage to buying live rock locally is to minimize the amount of die-off in the process which drastically shortens cycling time.

I started my hunt for live rock locally and went to Trop-Aquarium, a local fish store (LFS) that I’ve used numerous times in the past. However I wasn’t impressed with their live rock which looked like massive lumps of potatoes with weird tumors and there were hardly any color on them. I asked the guy at the store if he had any smaller pieces as I’m trying to put together a nano tank. He told me no and proposed breaking one with a hammer into smaller pieces as a solution. I politely declined and walked away.

Then I remembered a co-worker telling me about this place that had saltwater fish and supplies so I thought it might be worth checking out. The store is called ATM II and it was tiny, and all his tanks were dirty. They didn’t even look like the kind of tanks you find in an aquarium shop. Instead, they looked like the kind of tanks you’d find in a Chinese supermarket with live fish for food. In all fairness, the shop keeper was nice and helpful and offered to part ways with some of his smaller liverock pieces after I told him about my project. However it seemed to me like his rocks were seeded which wouldn’t offer much diversity in organisms. Plus his tanks were dirty.

At this point I’m absolutely disappointed and my hunt today has been fruitless. Maybe I’m better of buying live rock online which would delay this project by a week.

Friday, November 2, 2007

Introduction


Lately I've been setting my eyes on these nano reefs that everyone's been doing and I've been dying to do one myself with complete envy. Most people who know me know that I'm a big fish freak so I've decided to get in touch with my inner geek this weekend. For those who don't know, a nano reef is a saltwater aquarium that's less than 15 gallons and fully sustained by live rock, corals and various invertebrates. These tanks can look absolutely stunning and can even look much bigger than they really are. Google the word "nano reef," click on Images and you'll see what I'm talking about.

After doing some research and talking to several people online, I've finally decided to take the plunge. I'm no stranger to keeping marine fish though it has been ten years since I've kept a saltwater tank (Good God, I'm old!). In the past I've kept mostly fish only tanks so keeping invertebrates and planning my tank around them is completely new to me.

Another factor I considered is overall aesthetics. While it's definitely easy (and cost-effective) to take any size tank and pick and choose your own components to go with it, you'll often end up with a Frankenstein tank with wires, sumps and crap dangling everywhere. I definitely didn't want that. On the other end, there are a lot of all-in-one tanks on the market with all the necessary equipment and component housed within the tank itself and packaged in a nice little cube. These types of tanks can be found at decent prices and can go way up depending on the type of lighting and extra features you want.

Since this is my first venture into the unknown, I didn't want to commit to an all-in-one setup just yet so I opted for something smaller. I found a good deal at
Doctors Foster and Smith on a Picotope kit by JBJ. It’s much smaller than a nano—it’s a pico—and it's definitely small. I like that it's entirely made of glass with a bownfront and seamless corners for a nice panoramic view.


The kit comes with a 3 gallon glass tank, a modest 13gph power filter and a 9 watt 50/50 compact fluorescent lamp (half blue/half 10K). The tank all in all is very nicely designed but I’m also aware of the limitations the stock lighting presents. Obviously with a 9 watt 50/50 CF bulb my corals are limited to mushrooms, polyps (zoanthids) and various soft corals which are still some pretty good selections. And I probably won’t be able to keep fish in a tank this size.

I decided to document every step of this project to not only share with everyone who might be interested in setting one up themselves but also to share my experience and serve as a guide. Initially I wanted to post this blog on MySpace but decided it was probably far too nerdy to be on it. Plus with all the details and ongoing progress associated with this project, it ultimately deserves its own little place on the net.

Equipment

Here's a breakdown of the equipment and supplies, where I got them and how much I spent:
  • JBJ Picotope 3 gallon tank ($37.99 at Doctors Foster and Smith)

About $100 worth of supplies from Petsmart:

  • Oceanic Natural Sea Salt Mix (pre-measured to make 5 gallons)
  • Hydrometer (for measuring specific gravity in saltwater)
  • Hydor THEO 50W submersible heater and thermometer
  • Top Fin generic submersible powerhead
  • Red Sea Marine Lab master test kit (measures pH, alkalinity, ammonia, nitrite and nitrate)
  • 6 lbs. Ocean Direct Caribbean live sand

Spent about $8 at Lowe's:

  • 5 gallon bucket with lid
  • (2) small graduated buckets (comes in handy when measuring water during water changes)

$5 at Von's:

  • (5) 1 gallon drinking water (reverse osmosis/deionized NOT mineral water)

So far I've spent about $150 which is not too bad for the initial expense of gathering all the necessary supplies and equipment.